Smeg C9GVXI Manuel de service Page 7
- Page / 23
- Table des matières
- MARQUE LIVRES
- Contents 1
- Precautions for use 2
- 1. INSTRUCTIONS FOR USE 2
- 3. INSTALLING THE APPLIANCE 5
- 3.1 Electrical connection 6
- 3.2 Room ventilation 6
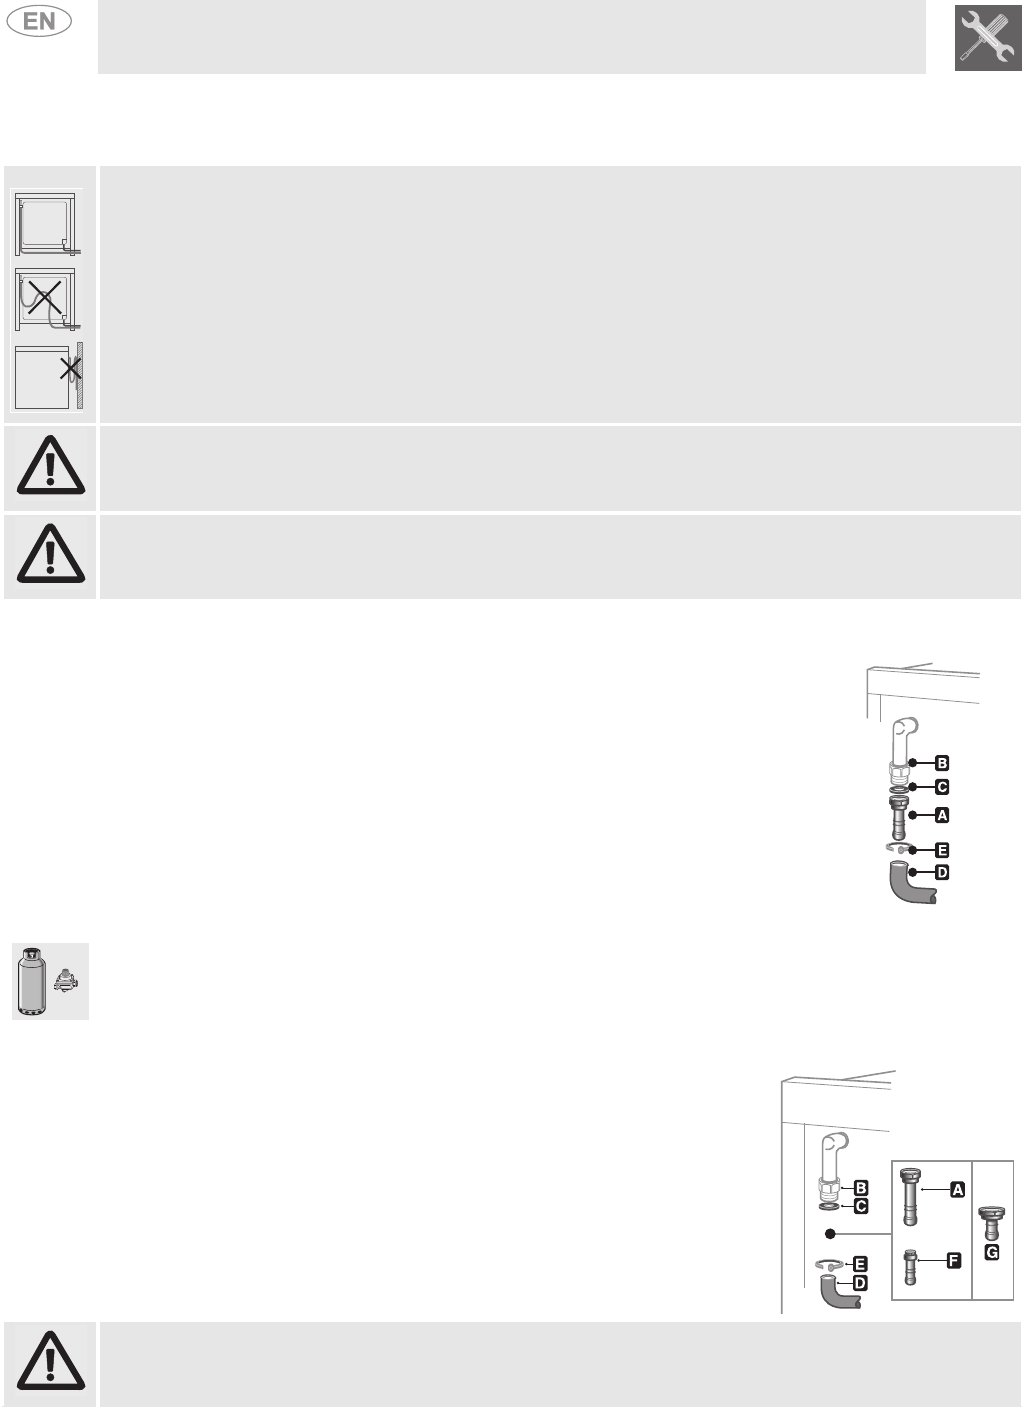
- 3.4 Connection to gas 7
- 5. FINAL OPERATIONS 13
- Instructions for the user 14
- 6. CONTROL PANEL 14
- 7. USING THE COOKING HOB 16
- 8. USING THE OVEN 18
- 9. AVAILABLE ACCESSORIES 20
- 10.CLEANING AND MAINTENANCE 21
- 11.EXTRAORDINARY MAINTENANCE 23
Produits connexes et manuels pour Cuisiniers Smeg C9GVXI
 (32 pages)
(31 pages)
(38 pages)
(16 pages)
(20 pages)
(38 pages)
(4 pages)
(32 pages)
(31 pages)
(38 pages)
(16 pages)
(20 pages)
(38 pages)
(4 pages)

 (8 pages)
(1 pages)
(1 pages)
(1 pages)
(1 pages)
(5 pages)
(1 pages)
(1 pages)
(1 pages)
(8 pages)
(1 pages)
(1 pages)
(1 pages)
(1 pages)
(5 pages)
(1 pages)
(1 pages)
(1 pages)
 (4 pages)
© 2020, manymanuals.fr. Tous droits réservés | 1.605 s |
 Manymanuals.com
 Manymanuals.de
 Manymanuals.fr
 Manymanuals.it
 Manymanuals.pl
 Manymanuals.cz
 Manymanuals.es
 Manymanuals-pt.com
Commentaires sur ces manuels